This is my full face routine, some days I will do only a few steps, all of them or none of them.
This routine uses all drug store products, not on purpose but it's hard to justify $60 for foundation when drug store do a perfectly good job.
OK here we go:
This is what my skins starts off looking like:
I have DARK circles, slight uneven skin tone and a few black heads and white heads.
Start off with a clean face. Before I put my make up on I use a oil free toner, a moisturizer, an eye serum and a eye cream. Let any products of this type sink in completely before applying make up.
Next use a foundation primer:
I particularly like this primer: It really evens out my skin tone and creates the perfect base for make up. Its a pale pink colour and it's texture is different from the more liquidy primer's I have tried, more of a whipped consistency.
I bought this primer at my local Shoppers Drugmart, it was on sale for around $8
I use my (clean) fingers to put this on, focusing on my T-zone and under my eyes.
Look like this after applying primer: evened out my skin tone nicely and matte'd my skin out somewhat.
Next I apply my foundation:
I use several different techniques to apply my foundation, fingers, sponge and finally my Holy Grail the Sigma Angled Top Kabuki F84. It is a dense, synthetic brush, made for applying creams and liquids. I love love love this brush, which seems to be the general feeling towards this brush :)
The foundation I used was the Revlon Colorstay Combination/Oily Skin in 110 Ivory. Purchased from Walmart for about $13.
It's a little to light for me, I recently went on a holiday to the Pacific and got a tan! But once I add powder and bronzer etc it all blends together at least I hope so.
I just wish that Revlon would put a pump on this bad boy! Having to pour out the foundation is annoying and messy!
Anywho, I place some foundation on the back of my hand and either dot it on my face and buff out with the brush or I pick up the foundation with the brush and then apply. This brush has definitely reduced how much foundation I use.
After foundation:
At this point my dad used to say to me, "Hail Pale Face"
I do feel the need to set the foundation with a powder. I have an oily T-zone so I also need powder.
But before that Concealer!
I use 2 different concealers one for under my eyes and another for covering up stuff on the rest of my face.
Bought this concealor from my Local Shoppers Drugmart: I honestly can't remember how much it cost. I'd say between $8 and $12
I know some people don't like products with applicators but this one works quite nicely. A couple of clicks and you have enough product for both under eye areas. I sometimes use my fingers or the applicator to blend.
NYX Concealer in Jar : Purcahsed: Ebay
This is a creamy concealer that I can use under my eyes but can sometimes have some creasing problems. I have a few fine lines under my eyes. But this is a great concealer for pimples and redness on your skin. Use my fingers to blend, the warmth of your fingers helps blend this way better than a sponge.
Now for some colour. Blush! Normally I would use a powder and then blush etc, but I recently purchased E.L.F Studio Cream Blush in Flirt from ELF for $6. You can apply cream blushes over powder but I prefer to set it as well.
I had trouble applying this with my finger so I tried it with a Duo Fiber Stippling brush from BH Cosmetics. Worked much better! I apply in what someone described as cinnamon scroll motions, starting in small circles getting larger. Starting from the top of the cheek down to the apple.
After Blush:
Next I went over my whole face with ELF Translucent Matifying Powder ($3) using a big fluffy brush: I use one from BH Cosmetics
I have been using this powder for about a week maybe a week and a half. Doesn't give much coverage however it does set my make up and doesn't look cakey which is important to me.
After powder I added a bronzer under my cheek bones, I blend bronzer like crazy, lines of bronzer aren't very attractive.
This is ELF Studio Bronzer in Cool ($3), This was my first time using it as I don't use bronzer very often, I'm more of a blush person. I did feel like with this colour I had to blend more than I normally would but it came out quite nicely in the end.
Next comes Highlighter:
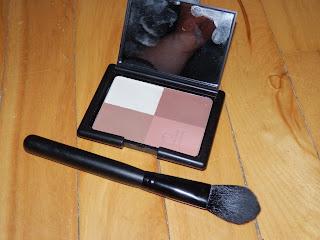
ELF Studio Blush in Gotta Glow ($3). I use the Sigma Tapered Highlighter F25 to apply this to my cheek bones, under my eyebrows, cupids bow and lightly on the brow bone.
After bronzer and highlighter:
I forgot to take a full on photo of my face! Whoops. So here is a photo from my upcoming everyday eye look. Full face (no mascara though)
Hope you like this post. An everyday eye look is in the works, just have to write up the post!


No comments:
Post a Comment